The garage door installation process is the step-by-step assembly and mounting of door panels, tracks, springs, and openers to transform a raw garage opening into a fully functional, insulated, and secure system. A professional installation typically takes 2–4 hours for a standard door, covering removal, track setup, spring tensioning, and safety testing. Brands like Clopay and Wayne Dalton dominate the residential market, offering everything from basic steel panels to fully insulated custom doors. Knowing what happens at each stage helps you ask better questions, catch problems early, and make smarter decisions about your home.
What are the essential steps of the garage door installation process?
A proper garage door installation follows a strict sequence. Skipping or rushing any step creates problems that compound over time, from misaligned panels to dangerous spring failures.
1. Measure and inspect the opening
The first task is measuring the opening width, height, and headroom. A structurally sound frame is non-negotiable. Shifting foundations or aging framing cause door issues that no amount of adjustment will fix permanently. The installer checks for plumb, level, and square before ordering or assembling anything.
2. Remove the old door safely
Removing old panels starts from the top after safely releasing spring tension and disconnecting the opener. Spring tension must be fully released before any hardware is touched. Skipping this step is how people get seriously hurt.
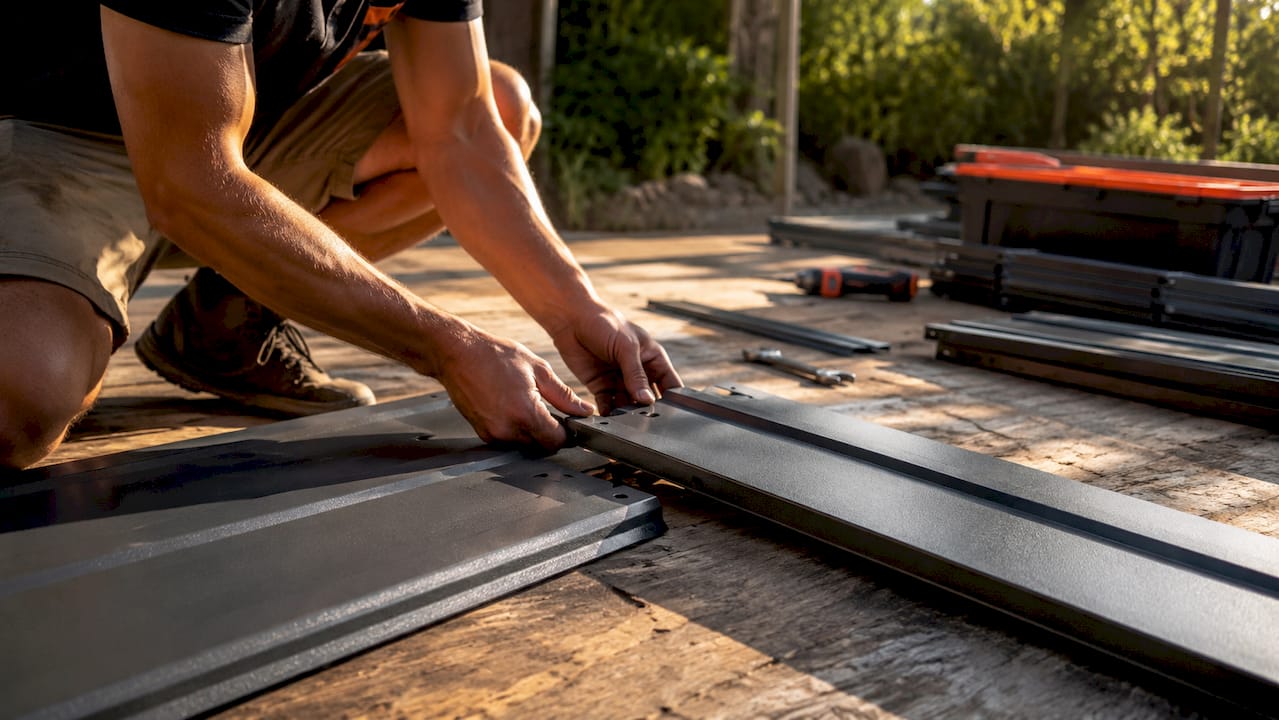
3. Assemble door panels on the floor
Panels are laid out on the garage floor and connected section by section. Leaving bolts finger-tight during this phase allows better alignment before final tightening. Locking everything down too early locks in any misalignment, which causes binding and premature wear.
4. Mount tracks and attach panels
Vertical tracks are secured to the door frame, and horizontal tracks are attached to the ceiling framing. Precise leveling at this stage determines how smoothly the door travels for its entire lifespan. Rollers are inserted into the tracks, and panels are attached sequentially from the bottom up.
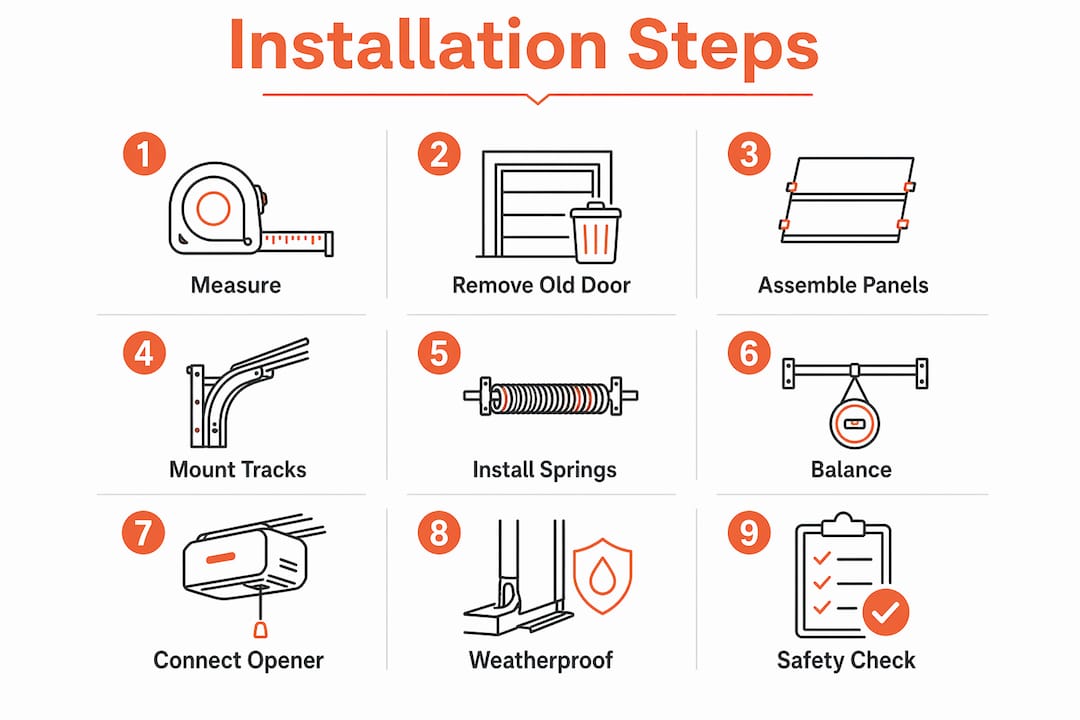
5. Install and tension the springs
Torsion springs or extension springs are mounted and tensioned according to the door’s weight and size. Spring replacement and tensioning should never be attempted without proper training and tools due to the risk of serious injury. This is the step where most DIY installations go wrong, and where professional help pays for itself.
6. Verify door balance
After tensioning, the installer disconnects the opener and manually lifts the door to the halfway point. A balanced door stays stationary at that midpoint. If it drifts up or falls down, the spring tension needs adjustment before anything else continues.
7. Connect and program the opener
The opener trolley is attached to the door bracket, and the drive system is aligned with the track. LiftMaster and Chamberlain openers are the most common residential choices. The installer programs remotes, keypads, and any smart home integrations at this stage.
8. Install weatherstripping and seals
Bottom seals and side weatherstripping are fitted last. Proper weatherstripping requires level tracks and correct framing. Misalignment reduces seal effectiveness and causes premature wear or energy loss.
9. Conduct safety checks and final walkthrough
Sensor alignment, auto-reverse testing, and a full operational trial complete the job. The homeowner gets a walkthrough covering manual release, opener programming, and maintenance basics.
Pro Tip: Ask your installer to show you the balance test in person. Watching the door hold steady at the halfway point is the single best confirmation that the spring work was done correctly.
How to operate the garage door manual release safely
The manual release is the red cord hanging from the opener trolley. Pulling it disconnects the door from the opener, allowing you to lift the door by hand during a power outage or opener failure. The manual release disconnects the opener from the door and requires proper reconnecting afterward to avoid damage to the trolley mechanism.
Knowing how to use it correctly prevents a frustrating situation from becoming a dangerous one. Here is what to do and what to avoid:
- Pull the red cord straight down or at a slight angle toward the door. Never yank it sideways.
- Lift the door slowly and steadily. Use both hands and keep your back straight.
- If the door requires more than 10–15 pounds of force to lift manually, the springs have likely failed. Stop immediately and call a technician.
- Prop the door open with a sturdy object if you need to pass underneath. Never rely on your hands to hold it.
- To reconnect the opener, pull the release cord back toward the opener unit, then press the wall button or remote. The trolley will re-engage automatically on most modern systems.
- Never use the manual release while the door is in motion. Wait for it to stop completely.
Pro Tip: Practice the manual release once a year when the power is on and the door is working normally. Doing it for the first time during an actual emergency, in the dark, is not the moment to learn.
What mistakes and safety risks should you avoid during installation?
Most garage door installation problems are predictable. They fall into a short list of errors that show up repeatedly across common repair mistakes documented by technicians in the field.
- Skipping the balance check. Balance verification is the most diagnostic check in garage door service. Failing to verify balance after spring work is incomplete work, full stop.
- Overtightening bolts before alignment. Locking down panel bolts before the sections are properly aligned creates binding that wears out rollers and tracks within months.
- Ignoring structural problems in the opening. A door installed in an out-of-square opening will never seal or travel correctly, regardless of how well the hardware is installed.
- Attempting spring work without training. Torsion springs store enormous energy. Releasing that energy incorrectly causes broken bones and worse.
- Using the wrong hardware. Springs are rated by door weight. Installing a spring rated for a lighter door on a heavier one shortens its lifespan dramatically and creates a safety hazard.
- Skipping sensor alignment tests. The auto-reverse safety feature only works if the sensors are properly aligned and tested. This is a legal safety requirement, not an optional step.
Knowing these risks also helps you evaluate a service call. A technician who skips the balance test or rushes through sensor alignment is not doing the job correctly, regardless of what they charge.
How does insulation affect garage door performance?
Insulation is one of the most undervalued decisions in the garage door buying process. Residential garage door insulation R-values commonly range from 6 to 20, with higher values delivering better temperature control and energy efficiency. For homeowners in Central Texas, where summer temperatures routinely exceed 100°F, the difference between an R-6 and an R-16 door is felt immediately in the garage and in adjacent rooms.
Weatherstripping and bottom seals complete the thermal picture. Proper weatherstripping costs $15–$40 for a 16-foot length and prevents air, moisture, and pest intrusion. That is a low cost for what it delivers in comfort and protection.
| Insulation level | R-value | Best for |
|---|---|---|
| Single-layer steel | R-0 to R-2 | Detached garages, storage only |
| Polystyrene foam | R-6 to R-9 | Mild climates, budget installs |
| Polyurethane foam | R-13 to R-18 | Attached garages, climate control |
| Premium insulated | R-18 to R-20 | Conditioned spaces, Texas summers |
Aesthetics and insulation do not have to compete. Clopay’s Gallery and Coachman collections, for example, offer polyurethane-insulated doors in wood-look finishes that perform well thermally and look far better than builder-grade steel. The custom garage door ordering process for these lines adds lead time, typically two to four weeks, but the result is a door that fits the home’s style and the climate’s demands.
Key Takeaways
A successful garage door installation depends on structural inspection, correct spring tensioning, balance verification, and proper weathersealing done in the right sequence.
| Point | Details |
|---|---|
| Inspect the frame first | An out-of-square or damaged opening causes long-term problems no hardware adjustment can fix. |
| Balance verification is mandatory | Lift the door to the halfway point after spring work; it must hold still before the job is done. |
| Manual release requires practice | Know how to use the red cord safely before you need it in an emergency. |
| Insulation R-value matters | Choose R-13 or higher for attached garages in hot climates to protect comfort and energy costs. |
| Spring work is not DIY territory | Torsion spring tensioning requires proper training and tools; the injury risk is serious and real. |
What I’ve learned after watching hundreds of garage door installs
Most homeowners walk away from an installation without understanding what actually happened. They see a door go up, hear it work, and assume everything is fine. The problem is that the two most critical steps, the balance check and the sensor test, take about three minutes combined and are the first things a rushed technician skips.
I’ve seen doors installed by well-meaning DIYers that looked perfect on day one and destroyed their openers within six months. The spring tension was slightly off, the door was slightly heavy on one side, and the opener motor compensated for it every single cycle until it burned out. The homeowner thought they saved money. They didn’t.
The gate automation process follows a similar logic to garage door installation: the mechanical work is only as good as the diagnostic work that follows it. A technician who spends time verifying balance, testing sensors, and walking you through the system is not being slow. They are doing the job correctly.
My honest advice: if you are considering a DIY installation, do the panel assembly and track mounting yourself if you are comfortable with it. Stop before the springs. Spring tensioning is the one step where the consequences of a mistake are immediate and physical. Hire that part out. The rest of the job is manageable with patience and a good installation guide. The springs are not.
One more thing: ask about the door’s balance before the technician leaves. If they cannot show you the halfway-point test, or if they seem annoyed that you asked, that tells you something important about the quality of the work.
— Oded
Ready to get your garage door installed the right way?
Edge garage doors handles the full installation process for Austin, Cedar Park, Leander, Georgetown, and surrounding Central Texas communities. From measuring the opening to the final balance check and homeowner walkthrough, every installation follows the complete sequence, no shortcuts.

Whether you are replacing a builder-grade door, upgrading to an insulated system, or adding a LiftMaster smart opener, the Edge garage doors team brings honest diagnostics and quality workmanship to every job. Explore professional installation services or check when to replace vs. repair your current door before committing to a full replacement. If something feels off right now, the warning signs guide is a good place to start.
FAQ
How long does a garage door installation take?
A professional garage door installation typically takes 2–4 hours for a standard residential door. That time covers removal of the old door, panel assembly, track mounting, spring tensioning, opener connection, and safety testing.
Can I install a garage door myself?
Panel assembly and track mounting are manageable for a skilled DIYer. Spring tensioning is not. Torsion springs store enough energy to cause serious injury and should only be handled by a trained technician with the right tools.
What R-value should I choose for my garage door?
Choose R-13 or higher for an attached garage in a hot climate like Central Texas. Polyurethane-insulated doors in the R-13 to R-18 range deliver the best combination of thermal performance and structural rigidity.
How do I know if my garage door is balanced correctly?
Disconnect the opener and manually lift the door to the halfway point. A balanced door holds that position without drifting up or falling down. If it moves on its own, the spring tension needs adjustment.
What does the manual release cord do?
The red cord disconnects the door from the opener trolley, allowing you to lift the door by hand. If the door feels heavier than 10–15 pounds when lifted manually, the springs have likely failed and the door needs professional service.