A garage door that won’t open is caused by one or more of five identifiable problems: power loss, remote or control panel failure, safety sensor faults, mechanical breaks like springs or cables, or a disengaged emergency trolley. The most common reasons include dead remote batteries, tripped breakers, blocked photo-eye sensors, and broken torsion springs. Knowing which category your symptom falls into cuts troubleshooting time from an hour to minutes. This guide walks you through each cause in order of likelihood, tells you what to check first, and tells you when to stop and call a pro.
Why your garage door won’t open: start here
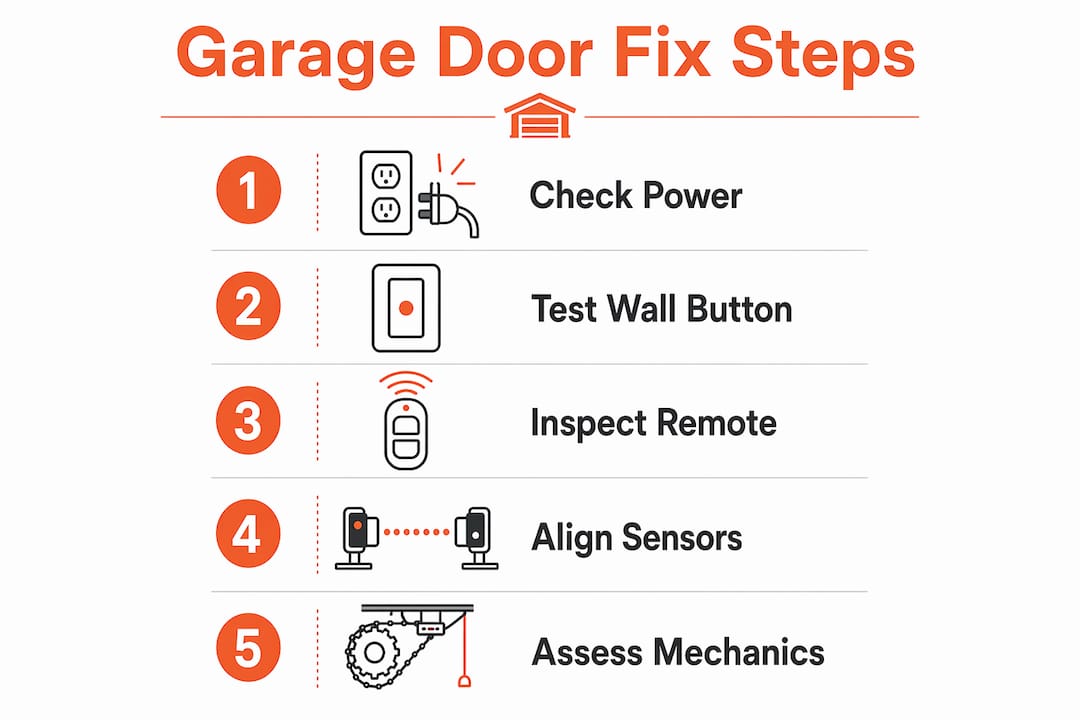
The fastest way to diagnose a stuck garage door is to match your symptom to a cause. A symptom-to-cause approach reduces trial and error by pointing you directly at the most likely problem. Before touching anything mechanical, run through this quick sequence: verify power, test the wall button, check the sensors, then inspect mechanical components.
This order matters. Electrical problems are safer and cheaper to fix than mechanical ones. Starting with the wall button instead of the remote immediately tells you whether the issue is in the opener itself or just in the remote. That single test eliminates half the possible causes in under 30 seconds.
How do power and remote issues stop a garage door?
Power problems are the most overlooked reason a garage door stops responding. The opener motor unit plugs into a standard outlet, and that outlet is often on a GFCI circuit or a dedicated breaker. Either one can trip without warning, especially after a storm or a power surge.
Here is the diagnostic sequence to follow:
- Check the outlet. Plug a lamp or phone charger into the same outlet. If it has no power, the outlet is the problem, not the opener.
- Reset the GFCI. Look for a GFCI outlet near the opener or on the same circuit. Press the reset button firmly until it clicks.
- Check the breaker panel. A tripped breaker sits between ON and OFF. Flip it fully off, then back on.
- Test the wall button. If the wall button works but the remote doesn’t, the issue is the remote, not the opener. Replace the batteries first.
- Check for lock mode. Many LiftMaster and Chamberlain openers have a lock or vacation mode that disables the remote signal. Testing wall button vs remote isolates this immediately. If the wall button works and the remote doesn’t, check the lock mode button on the wall panel.
Pro Tip: Plug a lamp into the opener outlet before assuming the opener is broken. A dead outlet is a two-second fix. A service call is not.
If neither the wall button nor the remote works, the problem is upstream: a dead outlet, a tripped breaker, or a failed logic board inside the opener unit itself.
What role do safety sensors play in garage door problems?
Safety sensors are the small photo-eye units mounted near the floor on each side of the garage door track. They shoot an infrared beam across the opening. If that beam is blocked, dirty, or misaligned, the opener will not close the door and, in many cases, will refuse to open it fully either.
Sensor LED status is the most reliable diagnostic tool before assuming sensor replacement. One LED blinking or going dark confirms a beam interruption or wiring fault. Both LEDs steady and lit means the sensors are communicating correctly.
Common sensor problems and what they look like:
- Misalignment: One sensor bracket has shifted. The sending sensor (usually amber LED) and receiving sensor (usually green LED) are no longer aimed at each other.
- Dirty lenses: Dust, spider webs, or grime coat the lens and scatter the beam. The door reverses immediately after starting to close or refuses to move.
- Physical obstruction: A broom, a bike tire, or a box sits in the beam path. Remove it and the door works instantly.
- Wiring fault: A wire has been pinched, cut, or corroded at the sensor bracket. The LED stays off even after cleaning and realignment.
- Sun glare: Direct afternoon sunlight hits the receiving sensor and overwhelms the infrared signal. The opener reads this as a blocked beam.
To fix misalignment, loosen the wing nut on the sensor bracket, point the sensor directly at its partner, and retighten while watching the LED. Cleaning lenses and realigning brackets until both LEDs are steady restores function in the majority of sensor-related failures. Only replace sensors after confirming the wiring is intact and alignment is correct.
Pro Tip: If your sensors act up every afternoon but work fine in the morning, sun glare is the culprit. A small cardboard shade taped above the receiving sensor solves it immediately.
What mechanical failures prevent a garage door from opening?
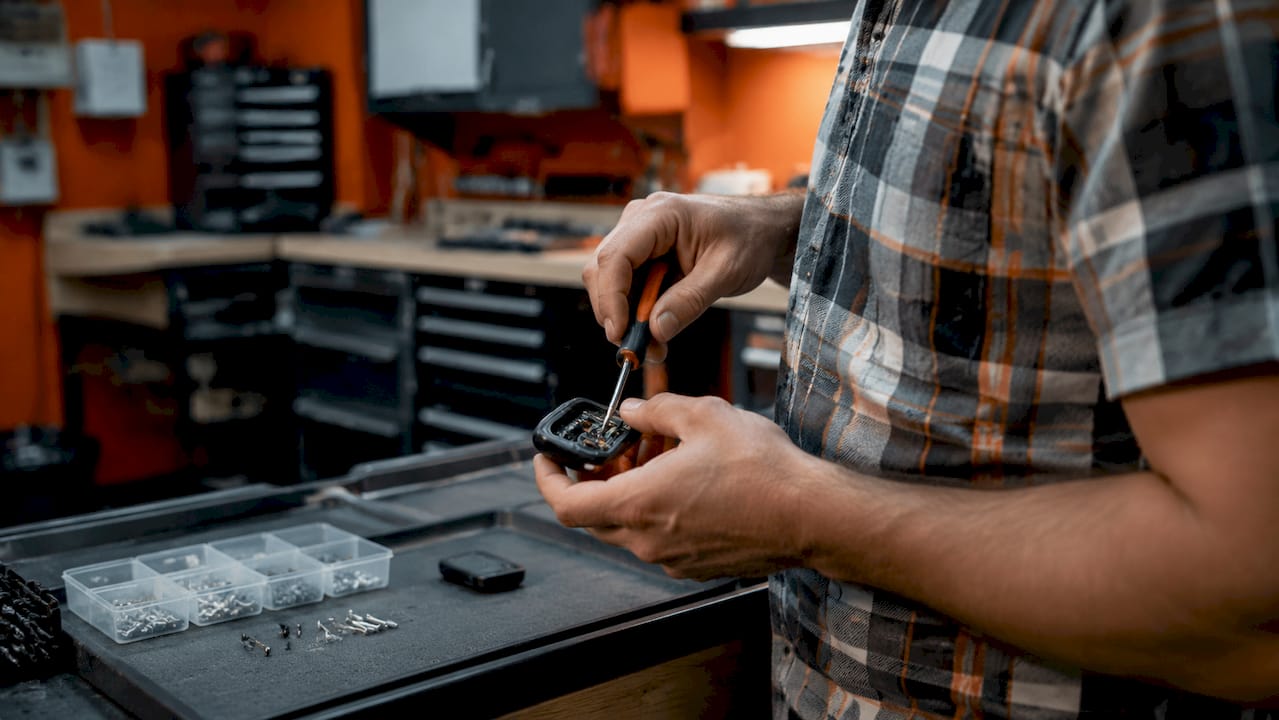
Mechanical failures are the most physically dangerous category of garage door problems. They are also the most misdiagnosed, because the opener motor still runs and sounds normal while the door sits completely still.
Broken torsion springs carry most of the door’s weight. When a spring breaks, the motor runs but cannot lift the door. The door may move an inch or two and stop, or it may not move at all. A broken spring often makes a loud bang when it snaps, similar to a gunshot inside the garage.
Other mechanical causes include:
- Disengaged emergency trolley: Pulling the red emergency release cord disconnects the door from the opener drive. The opener motor spinning without door movement is the clearest sign. Re-engaging requires pulling the release cord toward the door and manually sliding the door until the trolley carriage clicks back onto the drive rail.
- Snapped cables: Lift cables run from the bottom corners of the door up to the spring drum. A snapped cable causes the door to hang crooked or drop on one side.
- Stripped drive gears: Inside belt-drive and chain-drive openers, plastic drive gears wear out over time. The motor runs, the chain or belt moves, but the door does not. You will hear the motor spinning freely with no resistance.
- Bent or obstructed track: A dent or debris in the track stops the rollers from moving. The door binds partway up and refuses to travel further.
Safety warning: Springs and cables under tension are hazardous. Forcing a door with a broken spring or snapped cable can cause the door to drop suddenly, damage the opener, or injure anyone nearby. If the door feels unusually heavy when lifted manually, stop immediately and call a professional. This is not a DIY repair.
For emergency repair warning signs, broken springs and snapped cables always qualify. Do not attempt to operate the door until the repair is complete.
Why does a garage door stop short or reverse when opening?
Travel limits and force settings control how far the door travels and how much resistance the motor tolerates before reversing. When these settings are off, the door stops short of fully open, reverses unexpectedly, or refuses to move past a certain point.
Incorrect travel limits or force settings cause the door to stop short or reverse without any mechanical obstruction present. Force settings control how much resistance the motor allows before reversing the door. Improperly set force can create false safety triggers or hide real mechanical friction.
Always adjust in this order:
- Confirm sensors are aligned and both LEDs are steady.
- Test the door manually to rule out track obstructions or binding rollers.
- Locate the limit and force adjustment screws on the back or side of the opener motor unit.
- Adjust the UP travel limit in small increments. One full turn on the limit screw equals roughly two inches of travel on most openers.
- Test after each adjustment. Never increase force settings to compensate for a mechanical problem.
| Symptom | Likely Setting Issue |
|---|---|
| Door stops 6 inches short of fully open | UP travel limit set too low |
| Door reverses immediately after starting up | UP force set too low or sensor fault |
| Door opens fully then bounces back down | DOWN travel limit set too far |
| Door strains and grinds but moves | Force set too high, masking friction |
Pro Tip: Adjust limits in quarter-turn increments and test between each change. Large adjustments mask problems and can cause the door to slam into the floor or ceiling stops.
Do environmental factors cause a garage door to get stuck?
Weather affects garage door performance more than most homeowners expect. Ice buildup, extreme heat, and moisture can cause doors to stick or force the opener motor into a thermal protection shutdown.
Here is what each condition does:
- Ice on the bottom seal: In freezing temperatures, the rubber bottom seal bonds to the concrete floor. Forcing the opener tears the seal and can strip the drive gears. Break the seal manually before running the opener.
- Thermal shutdown: Opener motors have built-in thermal protection. On extremely hot days, a motor that has cycled repeatedly will shut down temporarily to prevent overheating. Wait 30 minutes and try again.
- Moisture and corrosion: Humidity corrodes metal rollers, hinges, and spring coils. Corroded rollers bind in the track and increase resistance beyond what the opener can handle.
- Dirt and debris in the track: Leaves, gravel, and grime accumulate in the track channel and block roller movement.
For Central Texas homeowners, heat is a bigger concern than ice. Austin summers push garage temperatures well above 100°F, and an opener running multiple cycles per day in that heat will trigger thermal shutdown faster than you expect. If your door slows down in summer heat, that is the motor protecting itself.
Pro Tip: Lubricate rollers, hinges, and spring coils with a silicone-based or lithium-based spray every six months. Avoid WD-40 on these parts. It strips existing lubrication and attracts dirt.
Regular maintenance also prevents cold weather door problems before they strand you in the driveway on a January morning.
Key takeaways
A stuck garage door almost always traces back to one of five causes: power loss, remote failure, sensor misalignment, mechanical breakage, or environmental resistance.
| Point | Details |
|---|---|
| Start with power and remote checks | Test the wall button before the remote to isolate electrical from remote-specific faults. |
| Sensor LEDs tell the whole story | A blinking or dark LED confirms beam interruption; clean and realign before replacing sensors. |
| Broken springs require a professional | A door that feels heavy or moves crooked signals spring or cable failure. Stop and call a pro. |
| Adjust limits only after sensor checks | Setting travel limits before fixing sensor faults masks problems and creates safety risks. |
| Seasonal maintenance prevents most failures | Lubricate moving parts every six months and inspect seals before winter and summer extremes. |
What i’ve learned after seeing hundreds of stuck doors
The single most common mistake homeowners make is skipping the wall button test. They assume the remote is fine, walk straight to the motor unit, and start poking at settings that have nothing to do with the actual problem. Two minutes with the wall button would have told them everything.
The second most common mistake is forcing a door that feels heavy. I understand the impulse. You are late, the car is inside, and the door is just sitting there. But a door that feels heavy when you lift it manually has a broken spring or a snapped cable. Forcing it risks dropping 200 pounds of door on whatever is underneath it. That is not a risk worth taking to save a service call.
My honest advice: treat the troubleshooting sequence as a checklist, not a suggestion. Power first, sensors second, mechanical third. Most homeowners who follow that order find the problem in the first two steps. The mechanical stuff is rarer than people think, but it is also the category where DIY attempts cause the most expensive damage.
The homeowners who avoid repeat breakdowns are the ones who schedule a tune-up once a year. Lubrication, sensor alignment, spring tension inspection, and a quick limit check take a technician about 45 minutes. That 45 minutes prevents the 7 a.m. phone call where the door won’t open and you have a meeting in an hour. Avoid common opener repair mistakes and you will extend the life of your system by years.
— Oded
When troubleshooting isn’t enough, call edge garage doors
If you have worked through every step above and the door still won’t move, the problem is almost certainly mechanical: a broken spring, a snapped cable, a failed logic board, or a worn drive system. These repairs require the right tools, the right parts, and someone who has done them before.
Edge garage doors serves Austin, Cedar Park, Leander, Round Rock, and the surrounding Central Texas area with honest diagnostics and same-day repair on most common failures. Before you decide whether to repair or replace, read the repair vs replacement guide to understand what makes financial sense for your specific situation. If the problem looks urgent, check the warning signs that need immediate repair before it gets worse.
FAQ
Why does my garage door opener run but the door won’t move?
The motor is running but the door isn’t moving because either the emergency release trolley is disengaged or a torsion spring is broken. Both conditions prevent the opener from transferring power to the door.
How do i know if my garage door sensors are the problem?
Check the LED lights on both sensor units near the floor. A blinking or dark LED confirms the infrared beam is interrupted, dirty, or misaligned. Clean the lenses and realign the brackets until both LEDs glow steady.
Can a dead remote battery cause the garage door to stop working entirely?
A dead remote battery stops the remote from working but the wall button will still operate the opener. If neither the remote nor the wall button works, the problem is a power issue, not the battery.
Is it safe to manually open a garage door with a broken spring?
No. A door with a broken spring is extremely heavy and can drop suddenly without warning. Lift it only enough to confirm the spring is broken, then leave it down and call a professional for spring replacement.
How often should i service my garage door to prevent it from getting stuck?
A professional tune-up once a year covers lubrication, sensor alignment, spring tension inspection, and limit adjustments. Homeowners should also lubricate rollers, hinges, and springs every six months between service visits.